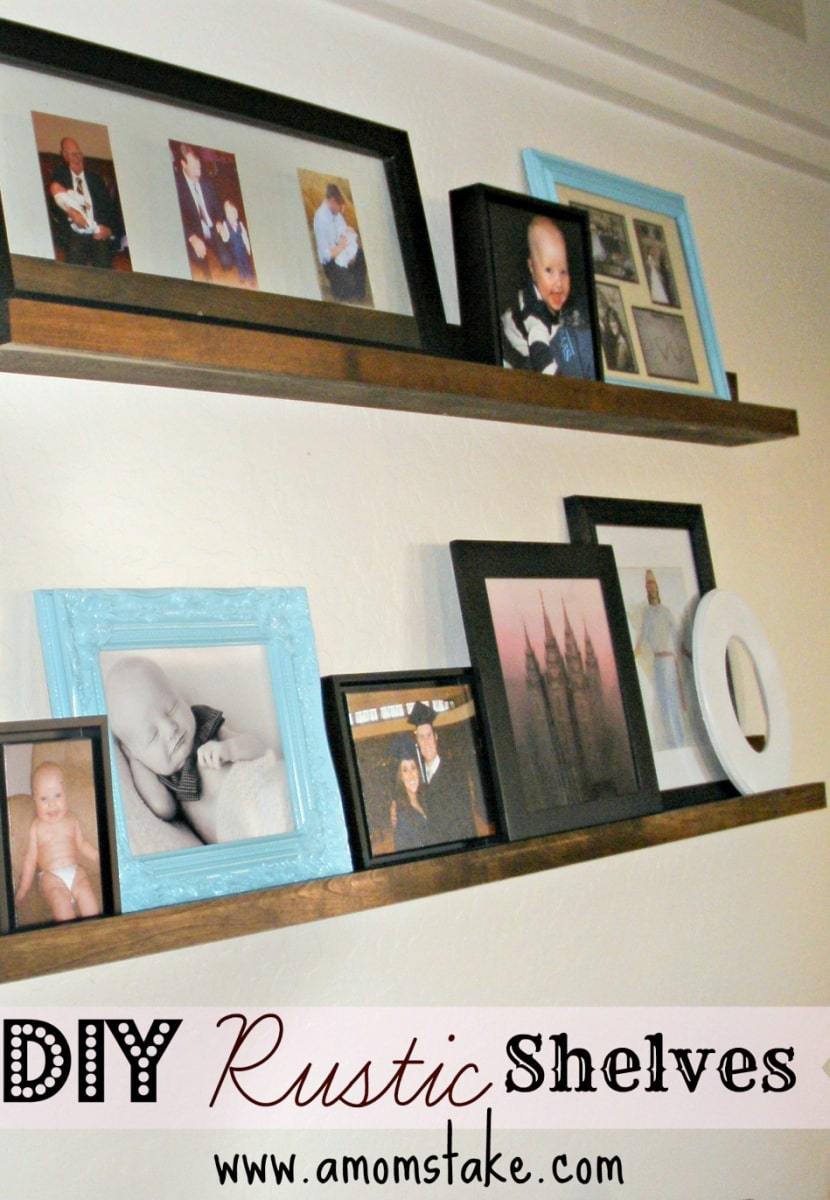
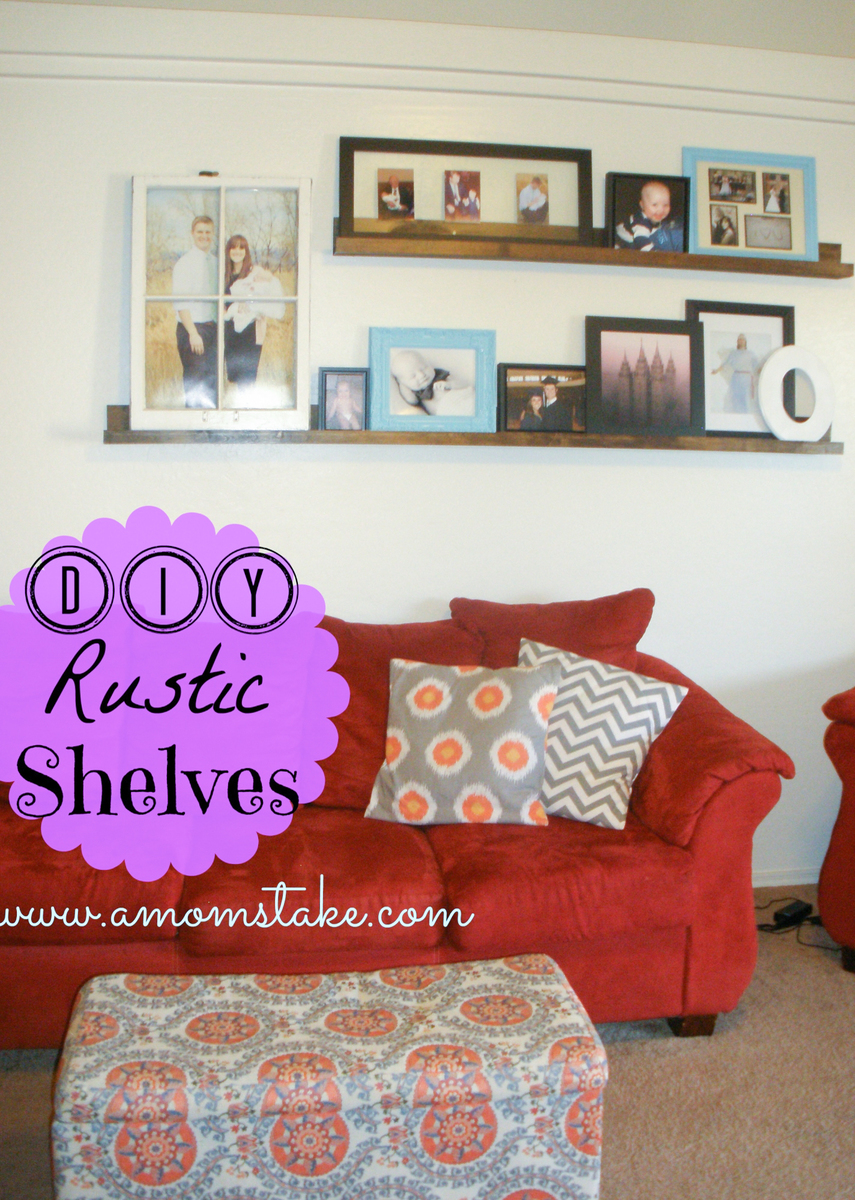
Easy DIY Rustic Shelves
I love working on household project with my husband; he loves using his tools and I love creating fun and unique home decor. A little while ago, I decided that I wanted to buy some shelves to make a picture wall in my family room. As I searched and searched, I realized that if I wanted to purchase the “ideal” shelves, I was going to have to fork out the big bucks. Being students on a budget, my husband and I decided to make our own shelves. I got the idea for these shelves from Shanty 2 Chic; however, I designed these shelves to work perfectly for my own home. I absolutely LOVE how our shelves turned out; the rustic feel adds such a unique touch to our home.


Easy DIY Rustic Shelves
Materials:
2″ Screws (we used about 12)
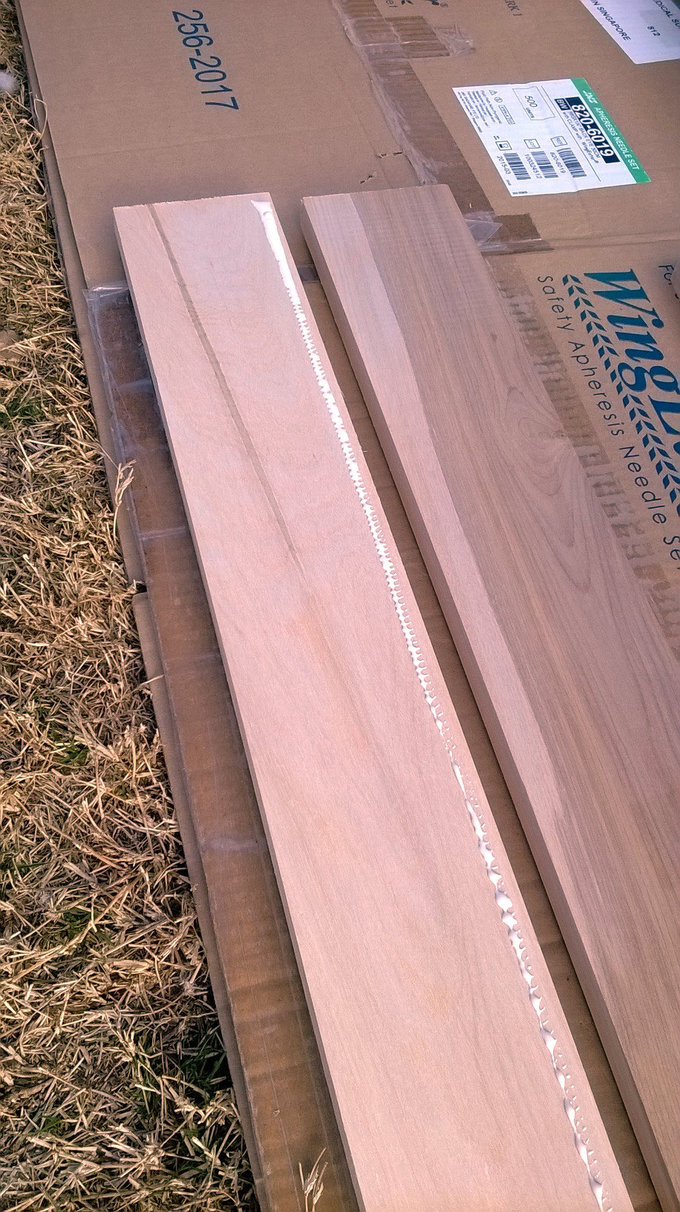
1 X 4 piece of wood (you need 2 per shelf; our shelves measured 7′ and 5′)
1 X 1.5 piece of wood (one per shelf; again, our shelves measured 7′ and 5′)
Wood glue (we used gorilla glue)
Wood Stain (we used walnut)
Instructions (Repeat instructions for both shelves):
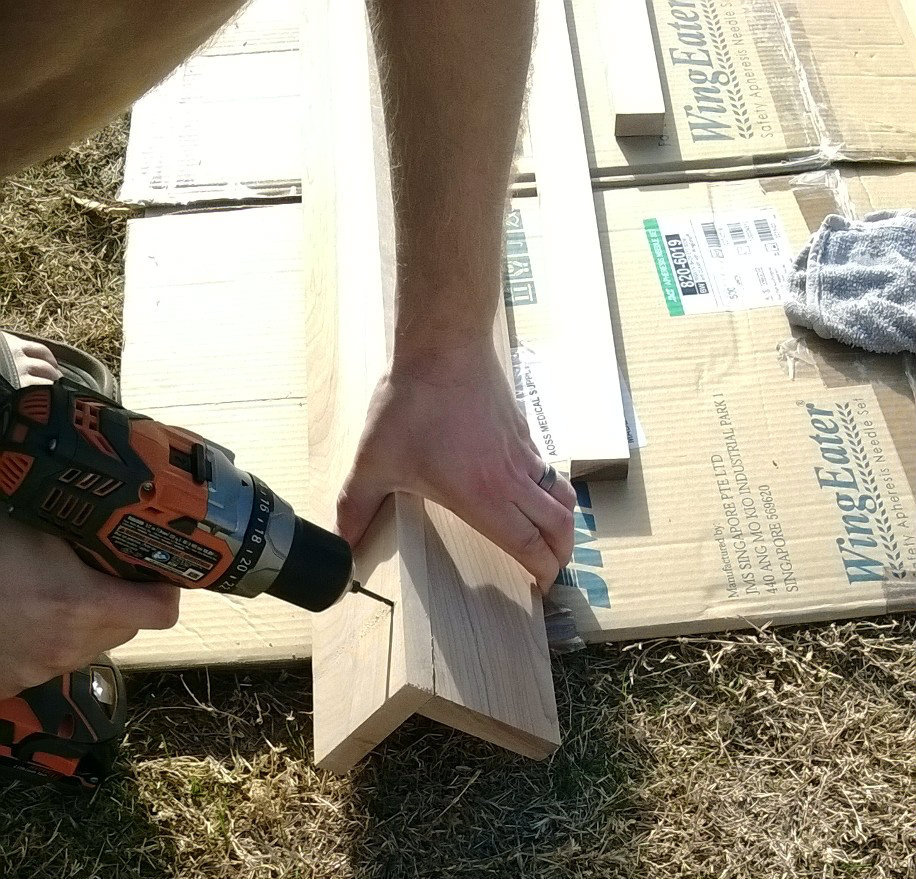
1. After gathering your 1 X 4’s together, apply a generous amount of wood glue to the edge of one piece of wood. Place the other 1 X 4 perpendicularly on top of that piece of wood. Because the wood glue takes about 20 minutes to dry, make sure to apply pressure during this time. Remove excess glue with a damp rag. You may choose to use clamps, but we just held the wood together using our body weight.
2. After the glue has dried, you will use your 2″ screws to fasten the wood together (as shown in the picture). For the 7′ shelf, we used 4 screws, for our 5′ shelf, we used 3 screws.

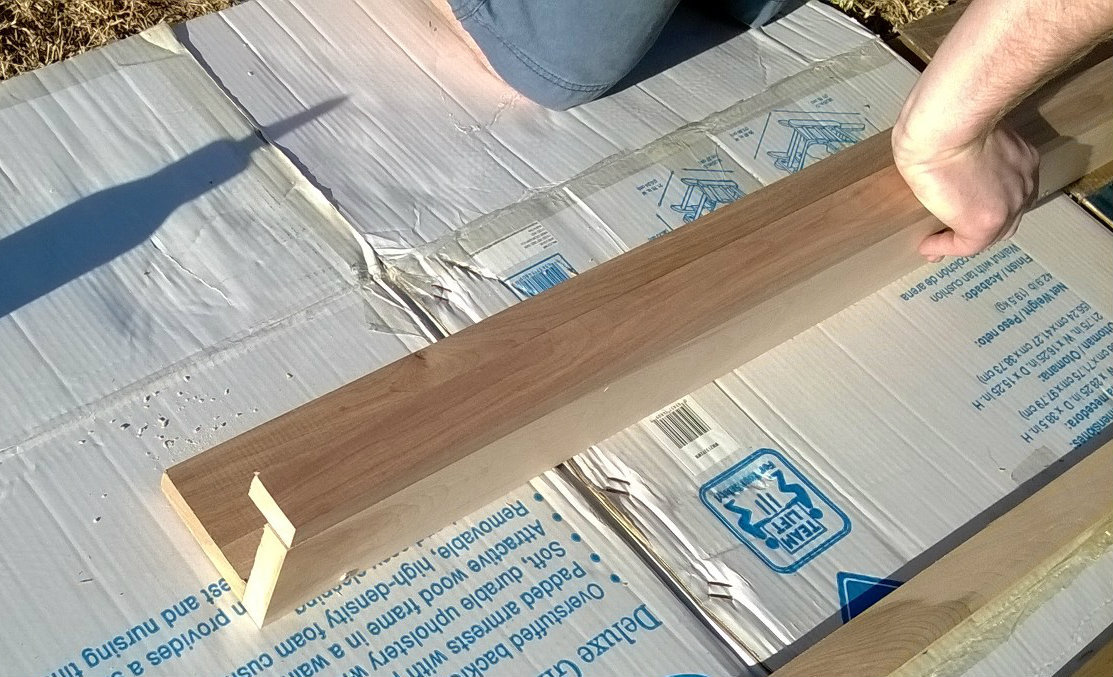
3. Now it is time to apply your 1 X 1.5 to the front of the shelf (using your wood glue). Again, make sure you apply pressure while the wood glue dries. Because the front of the shelf isn’t weight bearing, we just used wood glue to hold the wood together.
4. After the glue has dried, it’s time to stain your shelves. You may choose to sand the ends of the shelves, but I thought the “un-sanded” look felt more rustic. We let our stain set for about 10 minutes before we blotted up the extra stain and allowed our shelves to dry.

5. Make sure your shelves are completely dried before hanging. This was the hardest part for me because I was SO excited to hang them up. We let our shelves dry over night, but follow drying instructions on your wood stain.
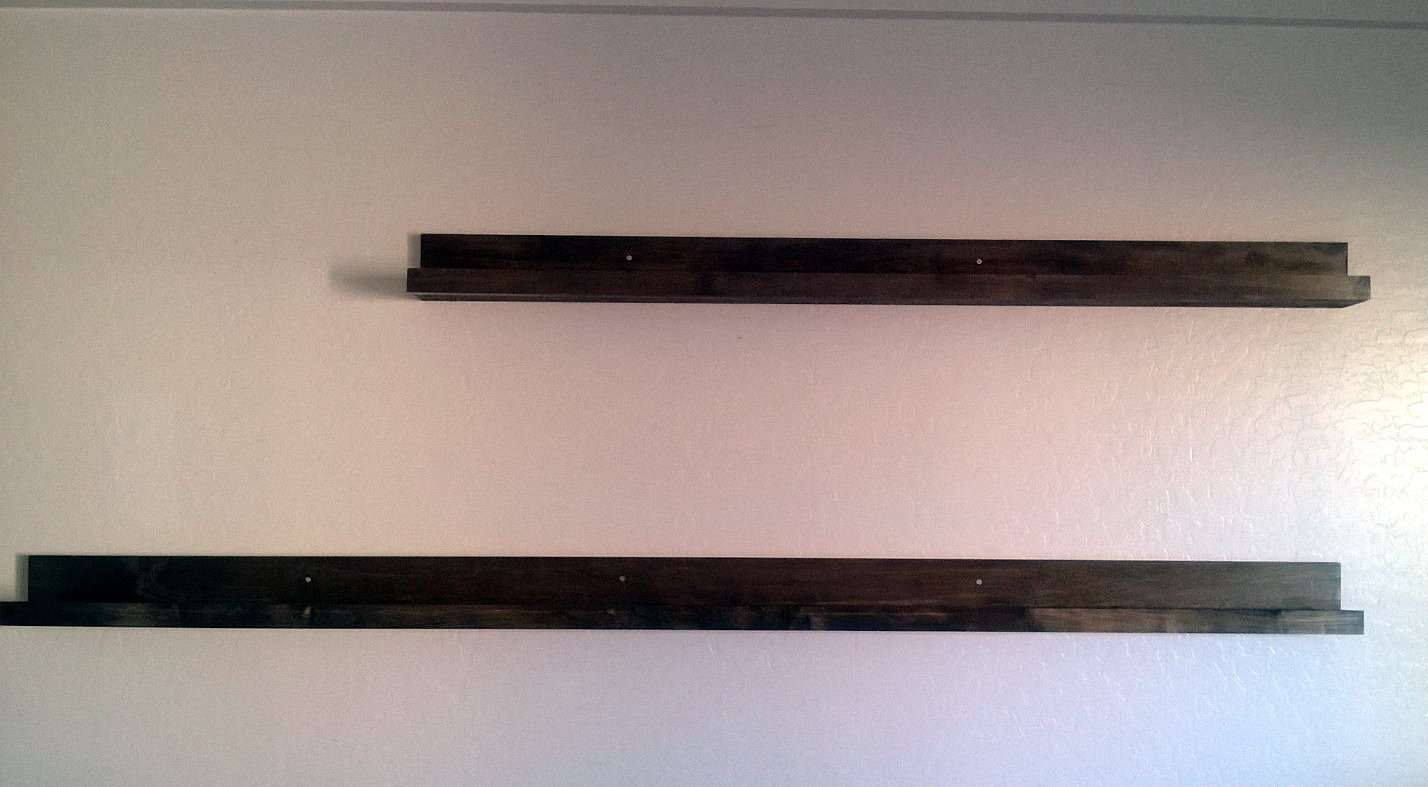
6. To hang the shelves, we used 2″ screws and drilled directly from the back of the shelf into the studs of our walls. Don’t worry about the screws being visible, the pictures will cover them.

I’ve also shared how to create a DIY Picture Wall! Come see how:


2 Comments
Comments are closed.