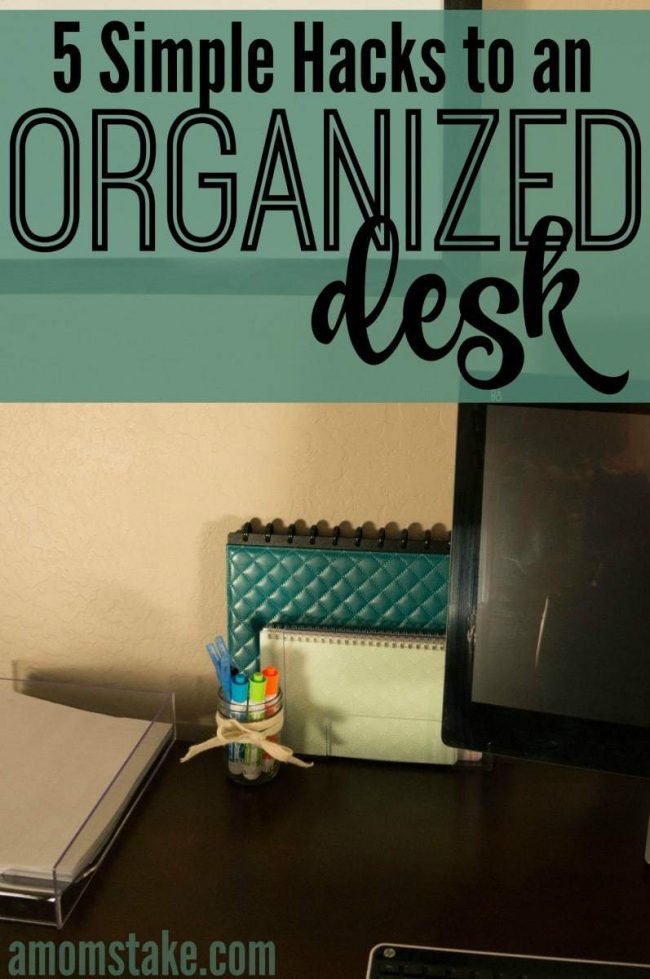
5 Simple Hacks to Organize Your Desk in Minutes!
Is your desk a mess? Most people’s desks are covered with papers, reminders, and office odds and ends. Sometimes there’s hardly any empty space to work! If you think your desk could use some help, check out these five simple ways to help you Organize Your Desk!
I received compensation and samples in exchange for this post.All opinions are my own.
5 Tips to Organize Your Desk
1. Use Trays for Papers
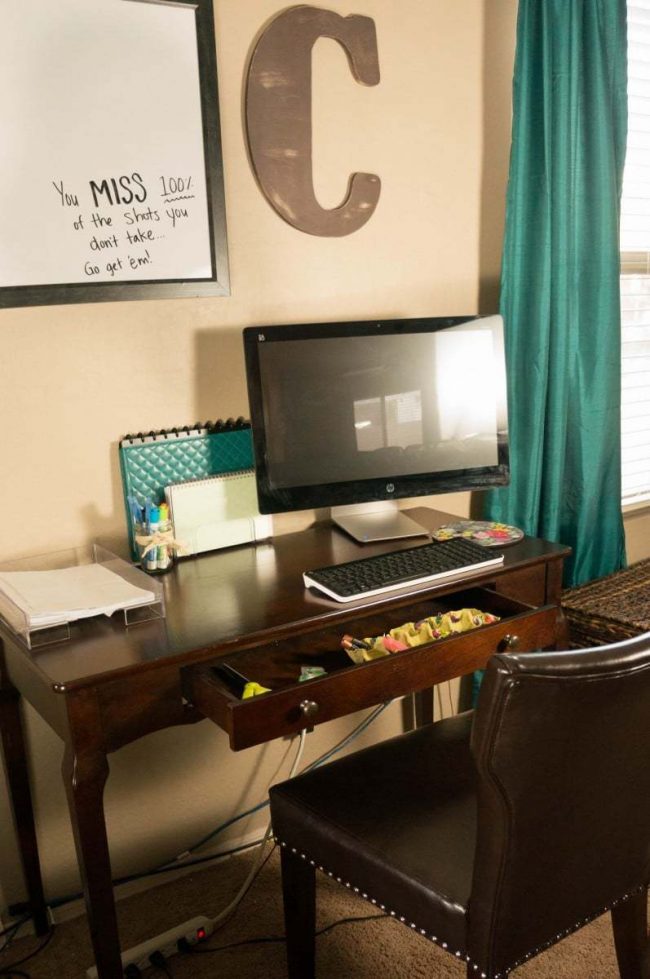
Loose paper is the #1 source of clutter for most desks. Most loose papers need to either be looked at or filed, but if you don’t have an organization system in place there’s nowhere for it to go until you decide to deal with it. So it just sits on your desk, taking up space. You can easily fix this by getting trays to hold your papers and having a filing cabinet or box ready. This way, your desk papers can be nicely organized, and take up less space! I use Staples Acrylic Purple Edge Letter Tray which gives a modern feel and doesn’t look tacky or out of place on the desk.
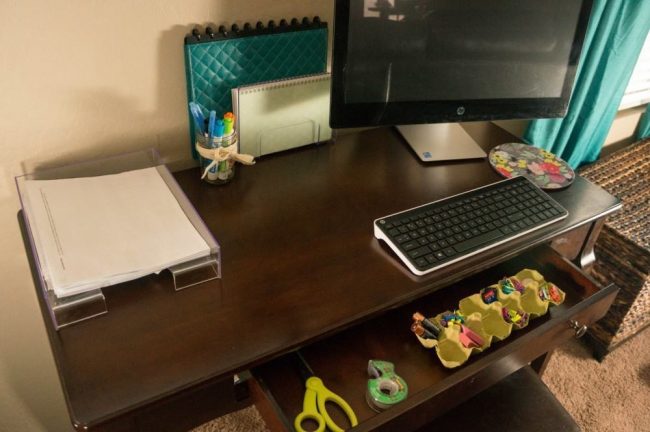
2. Give Loose Items a Place
Most people keep an assortment of paper clips, push pins, tape, whiteout, and other small office odds nd ends on their desk. This can quickly turn into a messy pile of office supplies. To organize your desk, take these items out of their original packaging and store them in small divided bins or cubbies. My favorite way to stash office supplies is to re-purpose an egg carton (with a quick coat of spray paint) to make everything easy to find!
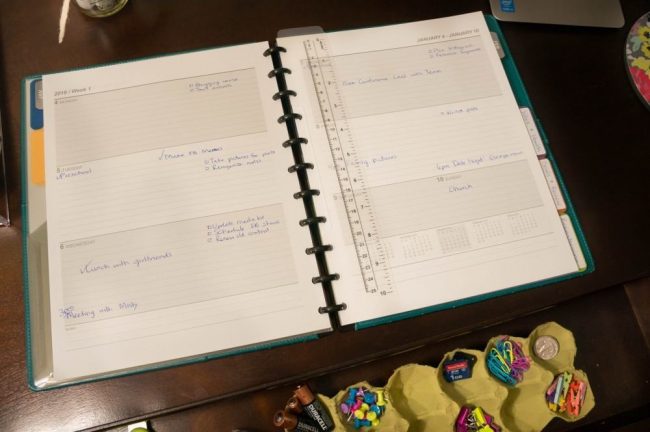
3. Get a Day Planner
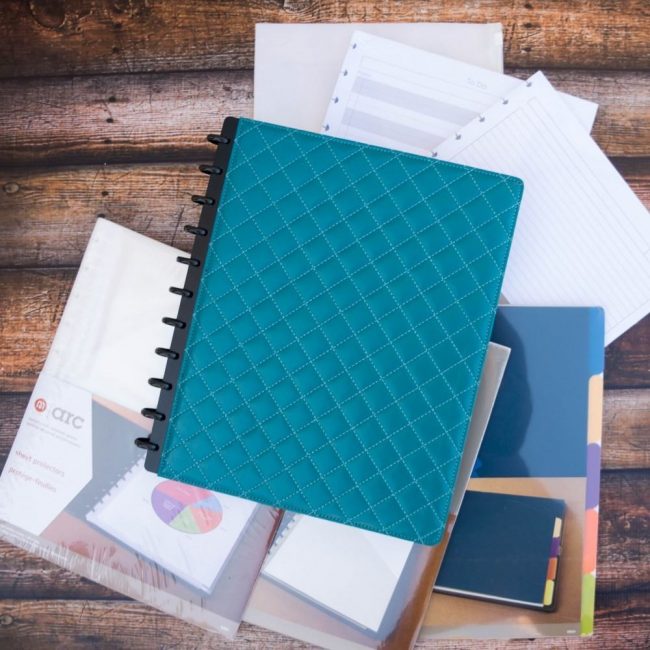
If you rely on Post-its and scraps of paper to hold your reminders, your desk may be messy because it’s covered with tiny papers! Rather than plastering your desk’s surface with sticky notes, consider getting a day planner to organize your appointments and to-do reminders in one place. You can even take your planner with you if you need it when you’re away from home! I have customized an M by Staples Arc System planner to become a DIY blog planner that perfectly suits my unique needs.
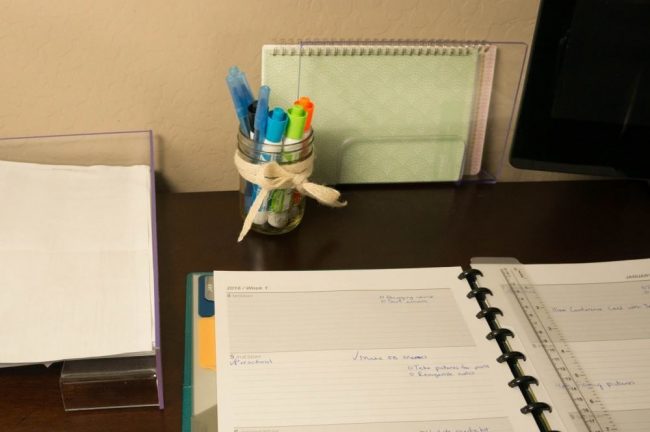
4. Organize Your Writing Utensils
Is your desk messy because it’s covered with various loose writing instruments? If you want to organize your desk, you have to find a place for your pencils, pens, highlighters, and markers! Make your own writing utensil holders by grabbing some mason jars or making a holder out of a recycled cereal box and some cute scrapbook paper.
5. Use a White Board
Sometimes you just need to get things off your desk and onto a wall. Maybe you have an important letter you want to be able to see as a reminder to yourself, or important coupons or paper gift cards. The best place for these things is not on the corner of your desk, but on a white board! Easily organize your desk by taking paper odds and ends and using magnets to put them on a white board near your desk where you can see them.
DIY Blog Planner with Staples ARC
To keep organized and on task this year, I’ve built a completely customized DIY blog planner using M by Staples Arc System planner. If you’ve never heard of ARC, you have got to check them out!
It’s a truly genius product!
You take a traditional spiral bound notebook, and instead make it customizable with spiral rings and refill pages that can easily pop on and off of the disks as needed. Plus, the ARC system has a huge variety of different refills to make your planner fit your unique needs perfectly.
Here’s how I’m using mine as a DIY Blog planner:
- Daily Blog Checklist – Start with a sheet protector with your daily blog checklist. You can then check your progress off as you go through the day with a dry erase marker.
- Monthly Blog Checklist – Next, add a monthly blog tasks checklist in a second sheet protector that you can work your way through once a month.
- Sponsors Paperwork Folder – Use a pocket divider to easily slip in and out paperwork you receive from brands to help you draft your posts and meet requirements.
- Add Dividers to organize your thoughts!
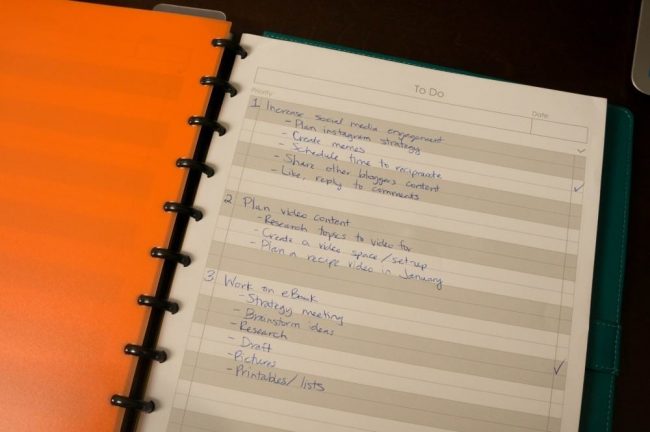
- Daily Tasks – Here you can use graph paper and write your post titles/ideas on the far left side – one per line. Then, use the squares that follow to make a checklist of typical tasks such as one column for draft, scheduled, pictures, seo keyword, twitter, facebook, instagram, pinterest shares, invoicing, paid, and any other tasks you routinely work through for your posts.
- Calendar – Week and month view will help you stay on task and meet your deadlines.
- Week and Month Tab – To set goals, jot down reminders, and prioritize my upcoming tasks.
- Goals & Review – I use this as a spot to track the big goals I have set for my blog. It is also used to review how those goals are affecting my site in terms of traffic, growth, or monetization.
- Brainstorming – Finally, I leave a tab with blank pages where I can jot down my ideas as they come to me and as a go-to spot for when I’m wondering what to post about next.
You could also add spots for tracking your income and expenses, contacts, past projects, and other similar ideas. I’m tracking these items in an excel sheet.
My favorite section is my goals tab. It is help by truly making my goals easy to find, review, work on and mark progress!
The M by Staples Arc System is going to help keep me organized this year, especially my desk to avoid that paper pile-up and sticky notes collection!
You can find M by Staples Arc System at Staples.com or at your local Staples store. They have two sized planners to fit 8.5″ x 11″ papers or half sheet 5.5″ x 8.5″ planner.
What do you do to keep your desk organized?
Your desk looks way better than mine. Mine becomes cluttered so quickly!
These are cute for little things but I have so much junk. I think my issue is I have clutter all over my office and not real solution.
i really love your space. how neat and great tips. thanks so much for sharing.
Wow, your desk is so neat! I love your tips.
I really need to use some of these hacks with my desk. It is a crazy mess right now!
Such a great post. I’ve been needing to organize my desk area, so this is perfect timing for me.
Those are great tips! I love the idea of reusing an egg carton!
I needed to read this! I really need a good planner.
Great tips. I love the egg carton in the drawer. My desk is always getting cluttered even after I clean it often. I should work on my desk tomorrow and try out that egg carton idea!
I love a clutter free de, thanks for the great tips, tomorrow I am putting them to good work on my office desk.
thanks for sharing these tips. My office space looks like a tornado hit.
Great tips! Especially the white board… although I got greedy and want to have all the walls painted with white board paint! lol It’s kind of expensive so hopefully that will be in the budget for next year! 😉
I am loving all of your tips! I am all over the letter tray idea. I use lots of them for my papers 🙂