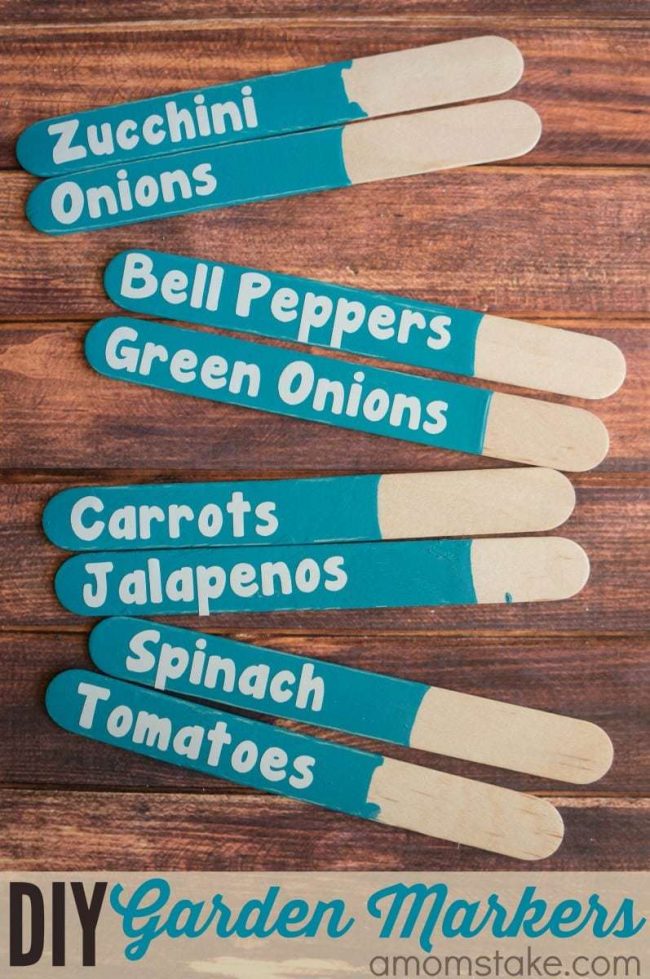
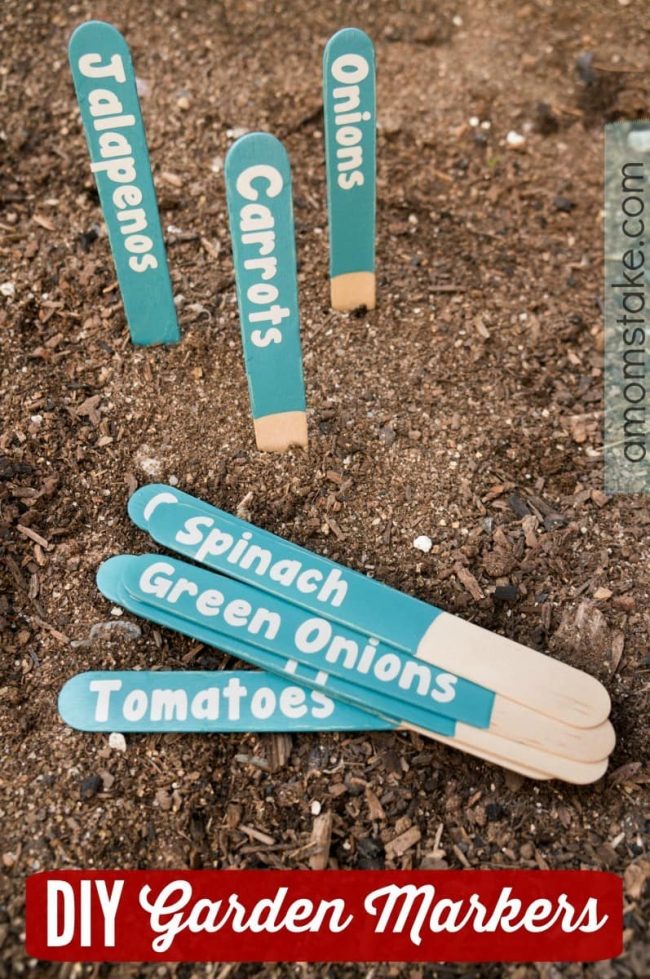
Easy DIY Garden Markers
Spring is nearly here, time to start planning our garden beds. These easy DIY Garden Markers are the perfect project to start with. They are cheap to make, look cute, and take just minutes to pull them together. The hardest part will be planning out where to put them in your garden beds!
Easy DIY Garden Markers

You’ll need:
- Tongue Depressors
- Paint
- Cricut vinyl cutter
- Vinyl
Start by planning out how many DIY garden markers to make based on what crops you’ll be planting this year. Dip your tongue depressors into a small quart sized can of paint, leaving the end of the stick paint free where you’ll put it into your garden bed so that you can easily hold the marker.
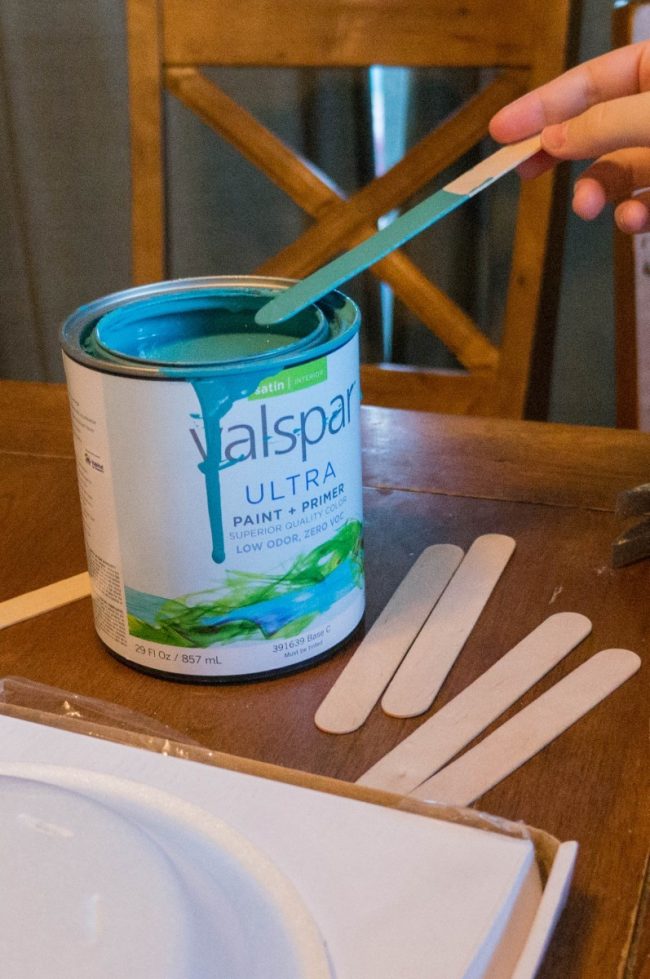 Slowly pull the garden marker out of the paint and softly scrape the stick against the edge of the can of paint. If you press down too hard, it will pull off too much of the paint. You still want a layer of paint on the stick, just not it overly wet. Flip the stick and scrape the other side as well. If you pull off too much paint, you can always re-dip and try again.
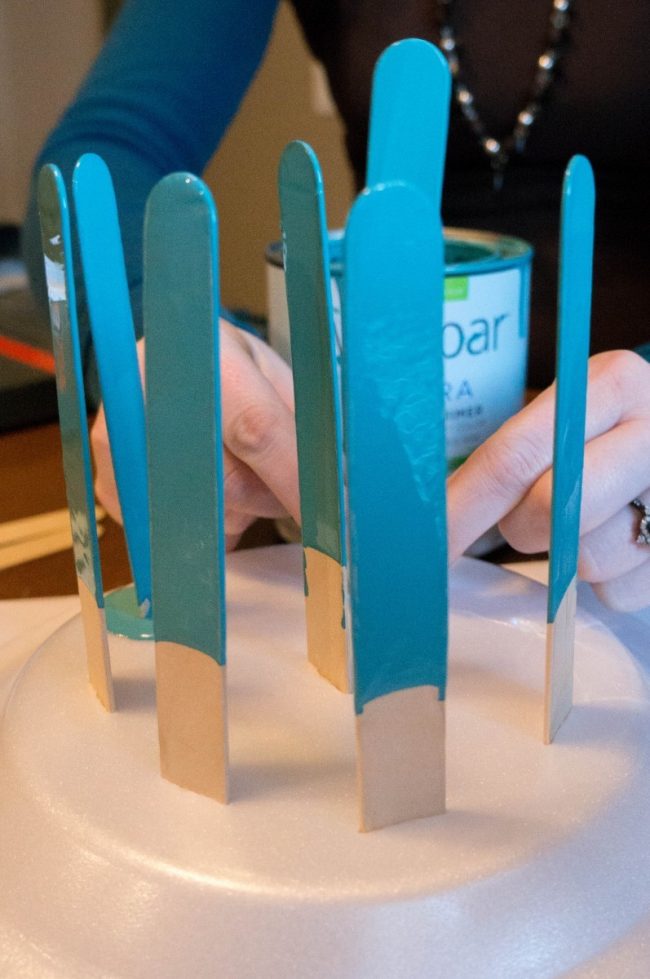 Punch the dry end of the garden markers into a foam plate so that they stand upright. This will let them dry without sticking to anything. While you wait for your garden markers to dry, start preparing your plant words to cut out on vinyl. You can use any font you’d like. I wanted a thick, chunky font that would be easy to read, but a script font would look really pretty, if you’re going for looks over function.
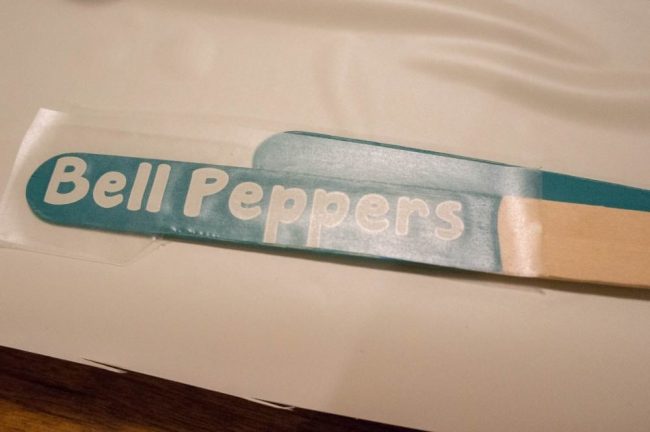 Measure your tongue depressors and size your font appropriately to fit both in letter height and word width onto your painted markers. Once you have them sized just right, set the Cricut to cut your vinyl and then weed out the excess vinyl and transfer your letters with contact paper.

What are you planting this year?
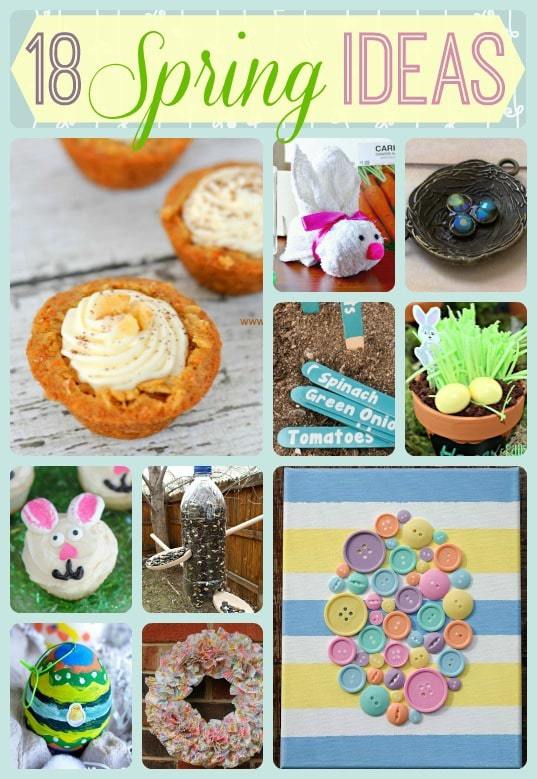
Find 17 more fun Easter/Spring ideas, visit a few of my favorite bloggers:
- Easy Easter Craft: Washcloth Bunny by Confessions of an Overworked Mom
- Bunny Cupcakes by This Mama Loves
- Simple Spring Wreath by Simply Southern Mom
- Carrot (Cake) Cupcakes by Mom Does It All
- Ultimate Easter Egg Dye Guide by The Guavalicious Life
- DIY Homemade Bird Feeder by My So Called Balanced Life
- Edible Easter Placemats by Two Boys One Girl and a Crazy Mom
- DIY Colorful Spring Wreath by Home and Garden Cafe
- Monogrammed Earrings by How Was Your Day
- Nest Necklace by Style on Maine
- Fun and Healthy Easter Recipe for Kids: Crepe Cookies by Our Family World
- Make an Easy Painted Eggs Easter Craft with Dollar Store Supplies by My Kids Guide
- Spring Tea Party with Lemon and Ginger Scones by Day by Day in Our World
- Spring Button Canvas by Better in Bulk
- Carrot Cake Cookie Cups by About a Mom
- Spring Tulle Wreath by Upstate Ramblings
- Easy DIY Spring Tote Bag for Girls by Philzendia

Love these! I have a Cricut so you can bet I’m going to make some of these for my garden this summer!
Hi! I just stopped by from the Show My Saturdays Link Party. These plant markers are great. So simple and easy to read.
Great idea. The hardest part in our garden isn’t finding where to put them, it’s keeping the toddlers from pulling them out!
Thank you for contributing to Motivation Monday!
I love how these came out. Amazing how great something simple in concept can be.
WHat a fun garden project! Now I just need some vinyl! Thanks for sharing!
Great idea! My kids keep asking me what’s growing, and I have no idea until I pull it up! I will definitely being doing this. Thanks! I am visiting from You’re Gonna Love It Link Party.
Wow! This is mouthwatering amazing! I would love for you to share this at my party Making Memories Mondays that is going on now! Hope to see you there! 🙂
Cathy
Great idea! These are so cute and be so easy to make. These would also be a great way to mark my plants so I will know where they are before they sprout up so I don’t come along and plant something ontop of others. These would be great in helping me remember what the flower names are too. Thanks for sharing your easy diy plant sticks.
Oh I love this idea! We did our first container garden last year and had so much fun with it. These would be great to put by each plant! Last year we did radishes, cherry tomatoes, watermelon, cucumbers, peas, green beans, green red and orange peppers, carrots, strawberries, and blueberries! So fun!
This an amazing idea. I will have to try it
I so need to do this, I always forget what I plant, and it’s like a surprise garden every summer:)
What a cute idea! I never would have considered using my cricut for the lettering.
These are so awesome! We plant a lot of stuff. We share a garden with my in-laws, so it is a huge garden. Bean, tomatoes, squash, potatoes, tomatoes, lettuce, pumpkins, corn, cucumbers, watermelon, strawberries… Yeesh!
What a great idea, I love the color you choose to paint the sticks with.
This is a great idea. I will have to pass this on t o my friend who is doing a garden this year.
These markers are adorable and I need these for my Garden. I will try to make these and put out in my garden! Thanks for the idea!
Oh, how cute are these??? They make me smile just to look at them! I’m going to try for an herb garden on the terrace and see how that works out.
I was wondering how you got the letters so straight and even. I never thought of using a cricut! I want to make some of these for my herb garden.
awesome idea!! Could also use paint stirrers! 🙂
What a neat idea! These would look great in any garden! Thanks for sharing!
That is an awesome idea. I never thought of using my Cricut for this!