
Olympic Medals: Stained Glass Window Art Tutorial
This winter, in addition to blustery days and chilly temperatures, we have something else to look forward to: the Winter Olympics!
Unless you’re traveling to Sochi, the closest you’re likely to get to the action is the TV screen. And although watching the Games and cheering on your favorite contenders from the warmth and comfort of home is great, wouldn’t it be fun to participate in a more ‘hands on’ way?
One way to do that is to create crafts that celebrate the Olympics! And the possibilities are endless when you consider just how diverse the events and countries are and all of the different ways you can translate that into an artistic activity.
So the next time you and your kids are cooped up on a cold and dreary day, bring the brightness inside by making your own Olympic-themed stained glass window art.
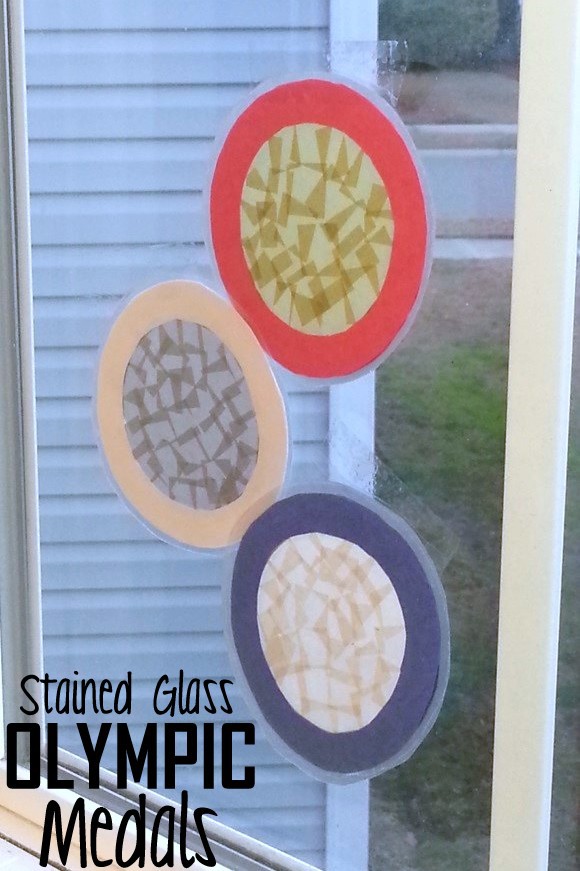
I decided to make Olympic medals out of red, white and blue construction paper and metallic gold, silver and bronze tissue paper and now my casement windows are decked out and dressed up for the festivities! Here’s how you and your little Olympians can make medals of your own.
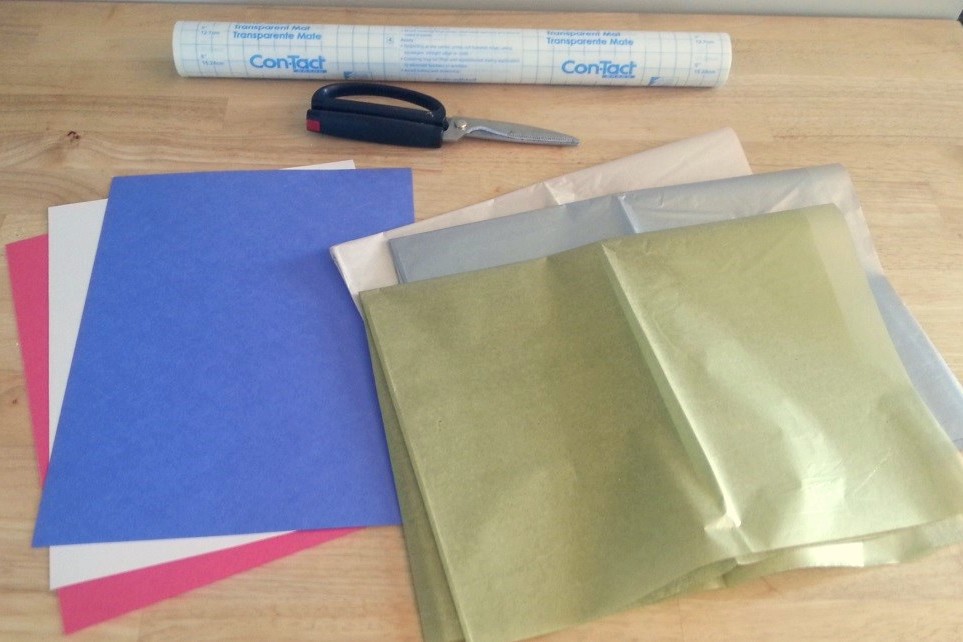
In addition to the construction paper and tissue paper, you’ll need:
- Clear contact paper
- Scissors
- 2 Round items for tracing the circles
- Pencil
- Glue Stick
- Clear Tape
Begin by folding your construction paper in half. Make sure that whatever you’re using to trace the circles will fit comfortably onto the folded sheet.
I used the glass lid of a jar candle for the outside and the top of a spray paint can for the inside circle but you can use whatever you have. A cup, base of a bowl, or roll of masking tape might work well – just be sure the outside of the circles are about 5-6″ in diameter and the insides are about ½” smaller all the way around. This allows a nice sized border to keep your medal together and show the color of the construction paper as well as sufficient space on the inside to show the tissue paper effect.
Once you trace the circles on the folded construction paper, start by cutting out the inside of the ring. I find this is easiest if you fold the paper up in the middle, make a cut with the scissors and then work your way around the ring.
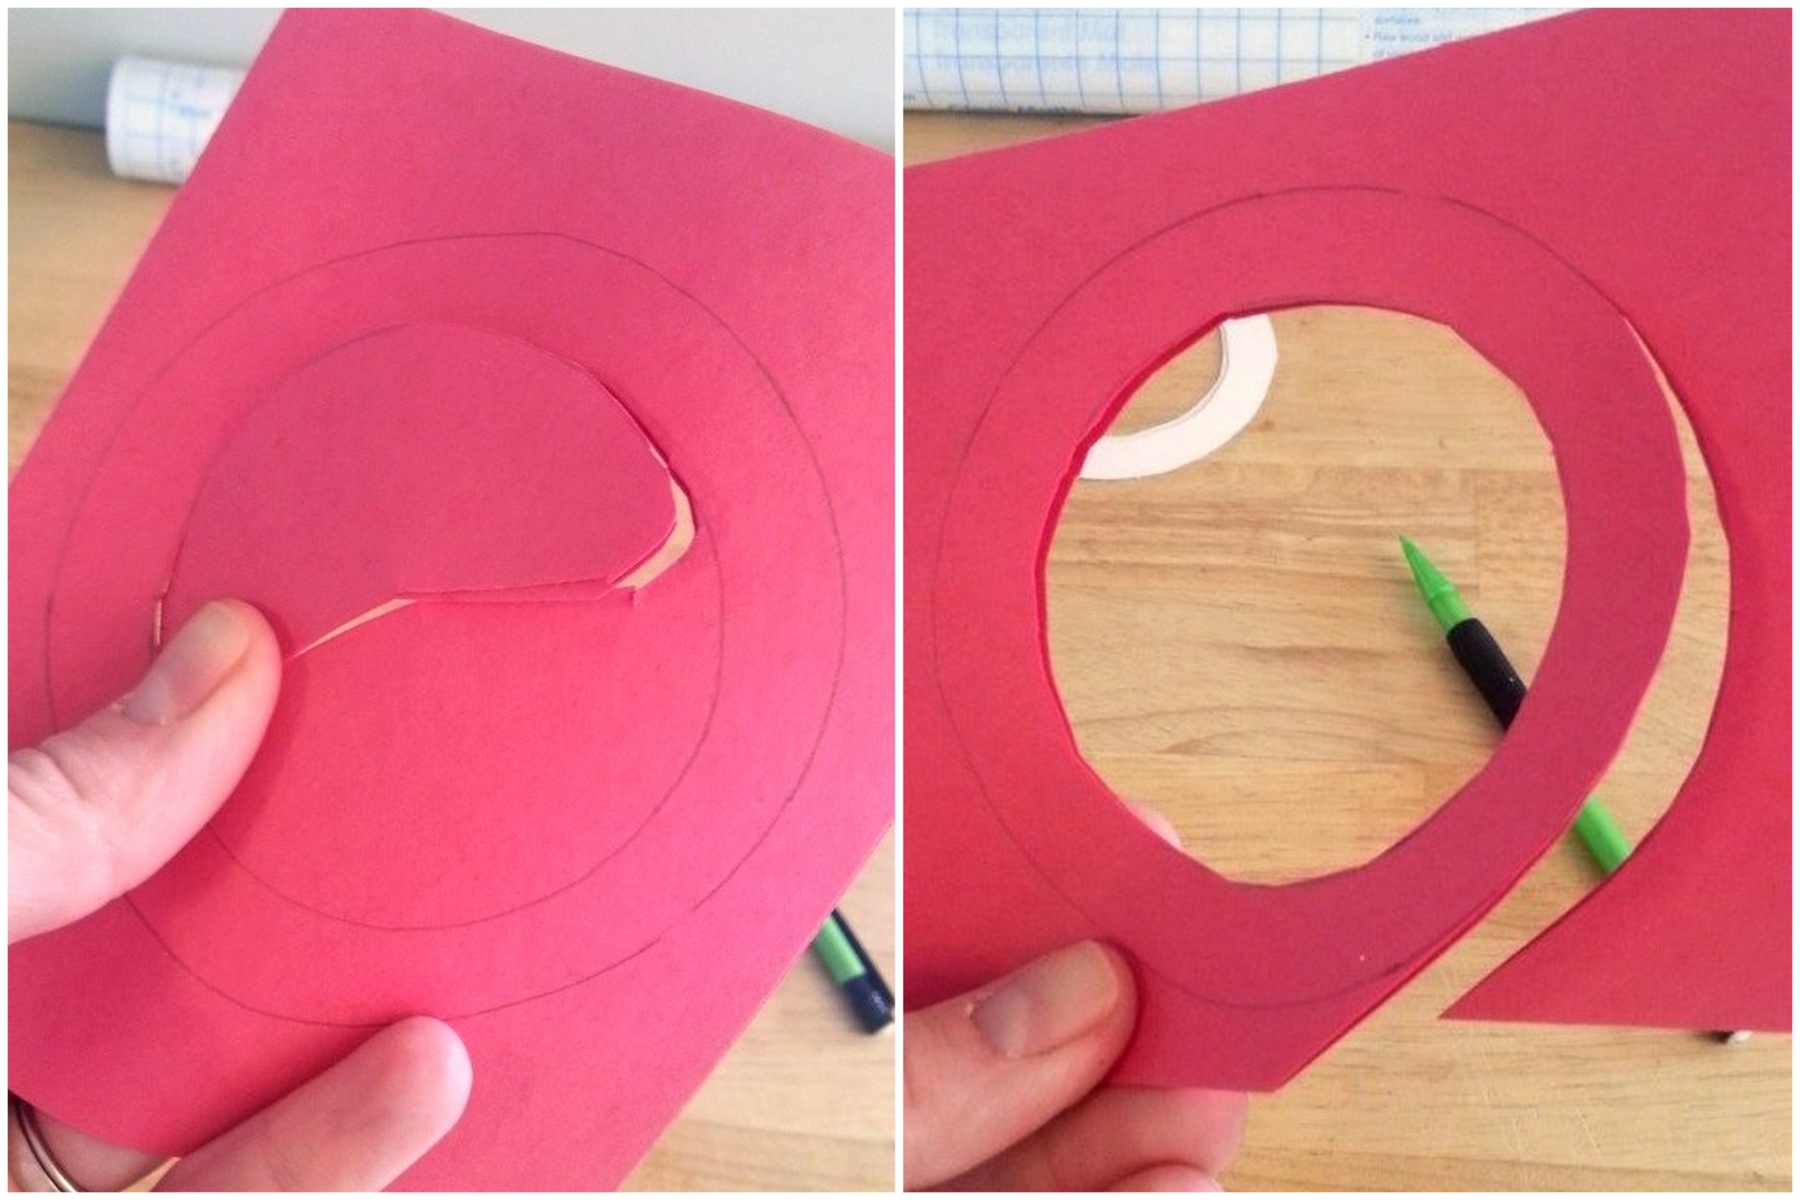
Next, cut out the ring from the paper. If you cut the folded side last, it helps to keep the pieces together so you have uniform circles. After these cuts, you should have 2 identical rings in each color.
From here, cut out two pieces of clear contact paper, making sure the rings will fit inside with a couple of inches of contact paper all the way around (mine were about 7″ wide, the entire length of the roll).
Separate the surface paper from one piece of contact paper and tape down the upper corners to a table with the sticky side up.
Take one of each of the rings and place it on the contact paper, spacing them with room in between each.
Now, cut a portion of each sheet of tissue paper. I cut a 7″ square section of each color and that was sufficient for my medals. Adjust your section based on the size of your medals.
One at a time, I cut each piece of gold, silver and bronze paper into narrow strips and then again into little ¼”- ½” squares. Begin filling in your rings by barely overlapping the metallic squares with one color for each ring.
I used the gold squares in the red rings and made sure to fully cover the edges, slightly overlapping onto the construction paper. This will be concealed when you place the other ring on top.
Continue filling the rings with their tissue squares (I matched gold with red, silver with white and bronze with blue) and place the partner ring on top, dabbing a couple of points with the glue stick to keep them in place.
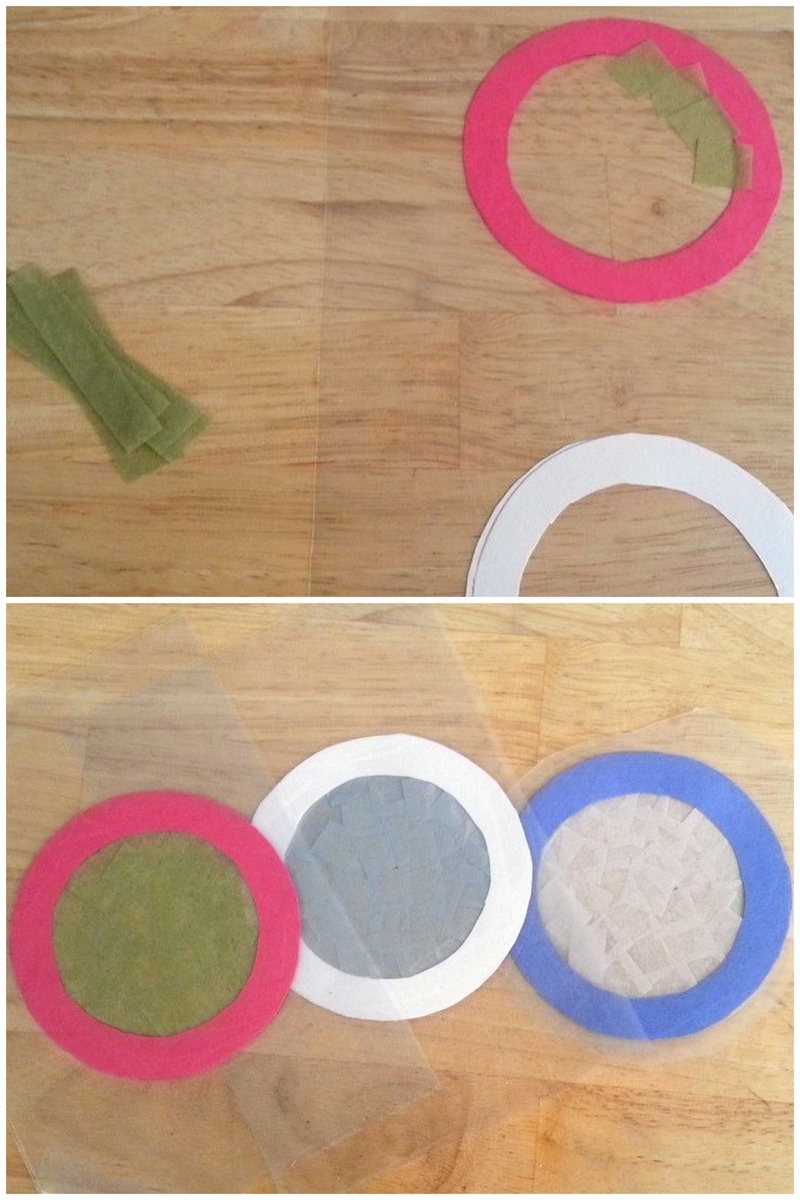
Peel back the other piece of contact paper, line up the top edges and cover the rings with the sticky side down to seal the rings inside, smoothing out air bubbles as you go.
Carefully cut out each ring and be sure to leave about ¼” of contact paper all the way around to keep them ‘laminated.’
Now they’re ready to hang in your window! They look (and adhere) the best when you clean your window glass first and dust off the casings.
What other Olympic-themed stained glass window art pieces can you come up with?
Rheney Williams writes about DIY projects for The Home Depot and helps readers with projects using materials available at a local store.
3 Comments
Comments are closed.