I love finding fashionable and unique ways to decorate for various events. This past weekend, I hosted a bridal shower for my best friend. I decorated the house with fun banners, a cupcake bridal gown (courtesy of my talented mother), and different colored tissue-paper pom poms.
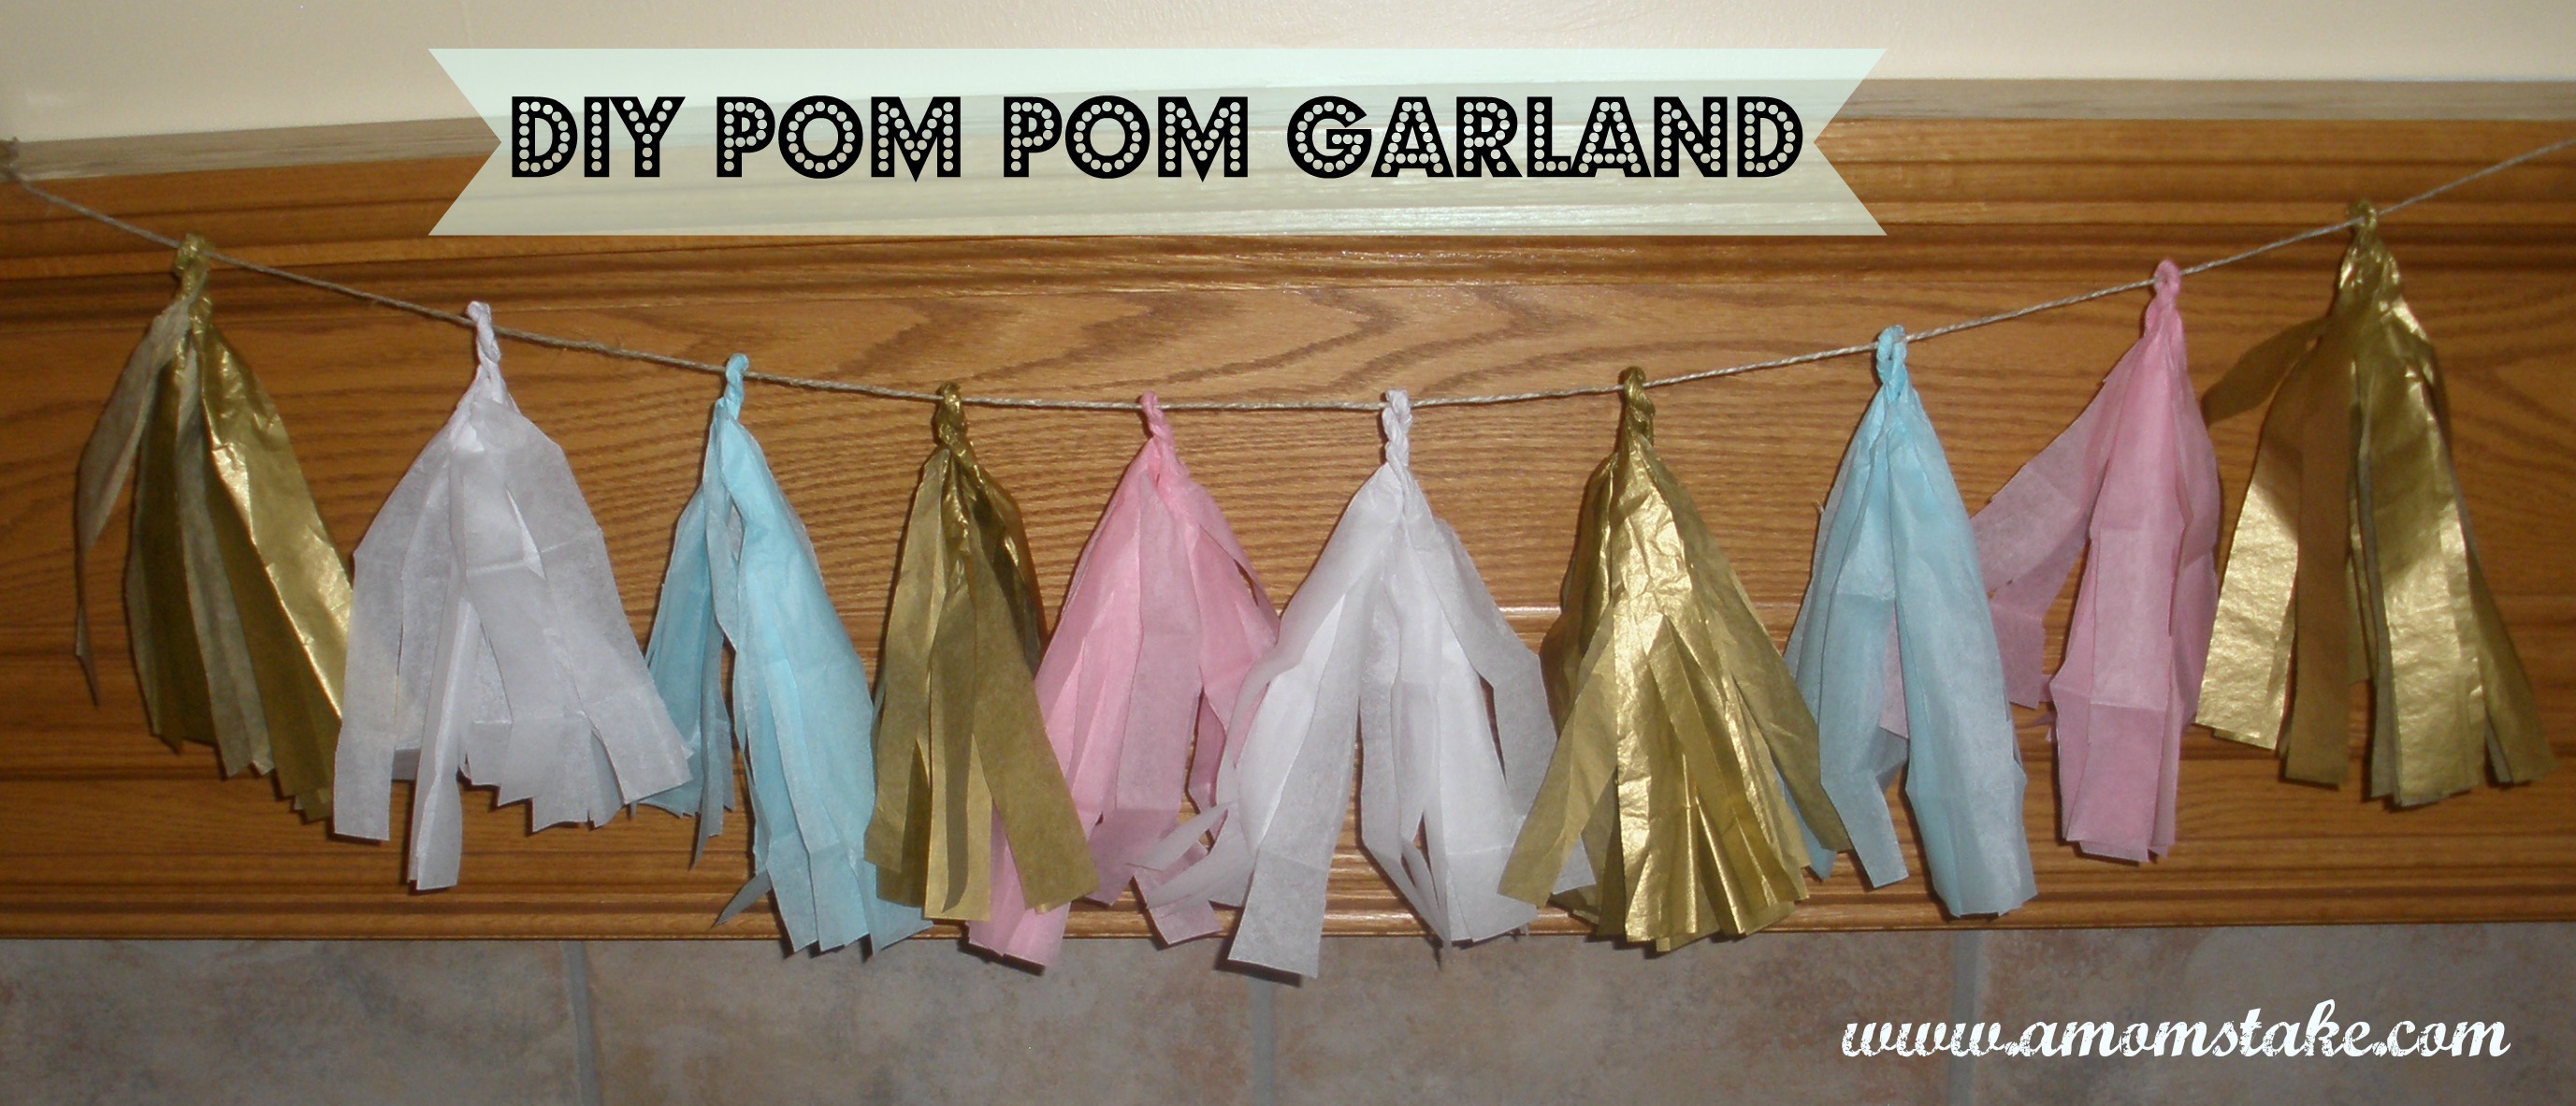
Although these decorations turned out adorable, my favorite piece of decor was the pom pom garland that I made. It was super easy, took about a half hour to make, and looked super classy. Gathering ideas from different garland tutorials online, here’s how I decided to make the perfect tissue-paper diy pom pom garland.

DIY Pom Pom Garland
Supplies:
1. 5-8 Pieces of tissue paper
2. Scissors
3. Twine
Directions:

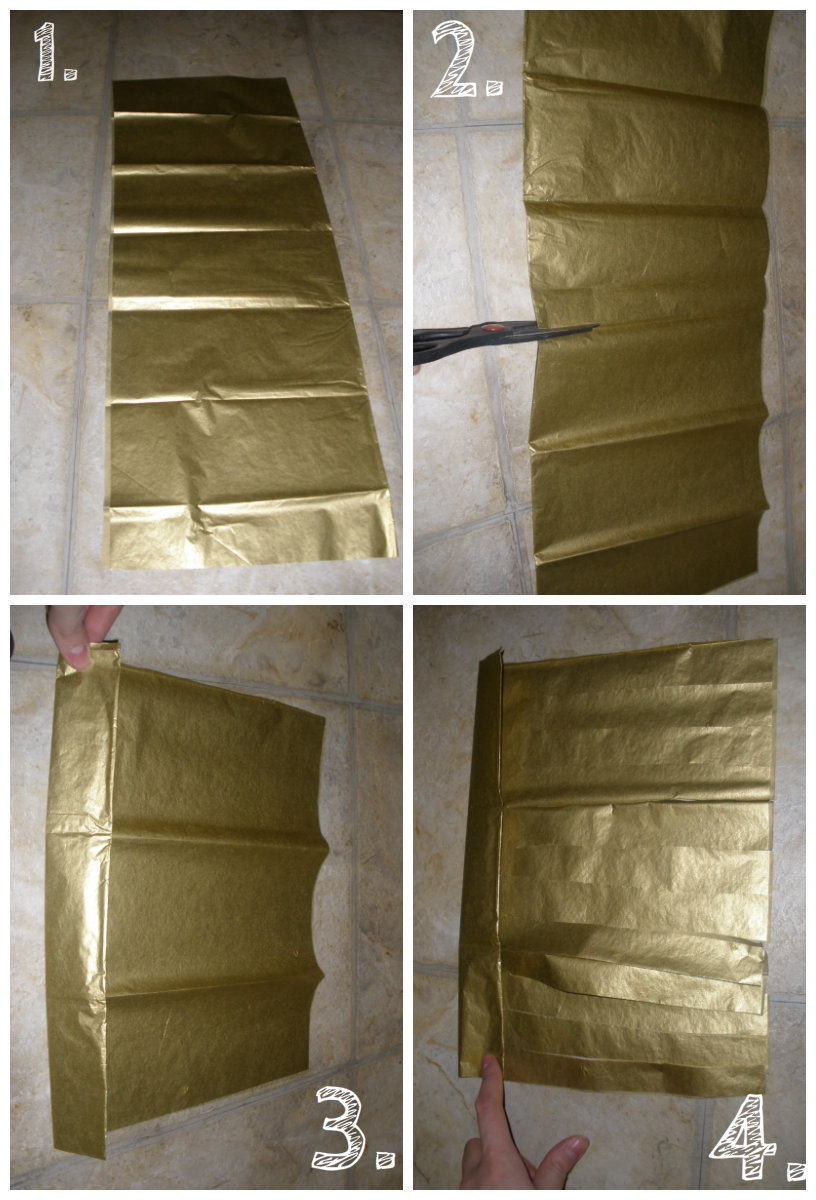
1. Start by folding a single piece of tissue paper hot dog style (length-wise).
2. Cut the tissue paper in hamburger style (width-wise).
3. At the crease, fold the tissue paper down 1 – 1.5 inches.
4. Cut 1/4 – 1/2 inch strips from the bottom of the tissue paper to the fold (don’t cut through the fold).

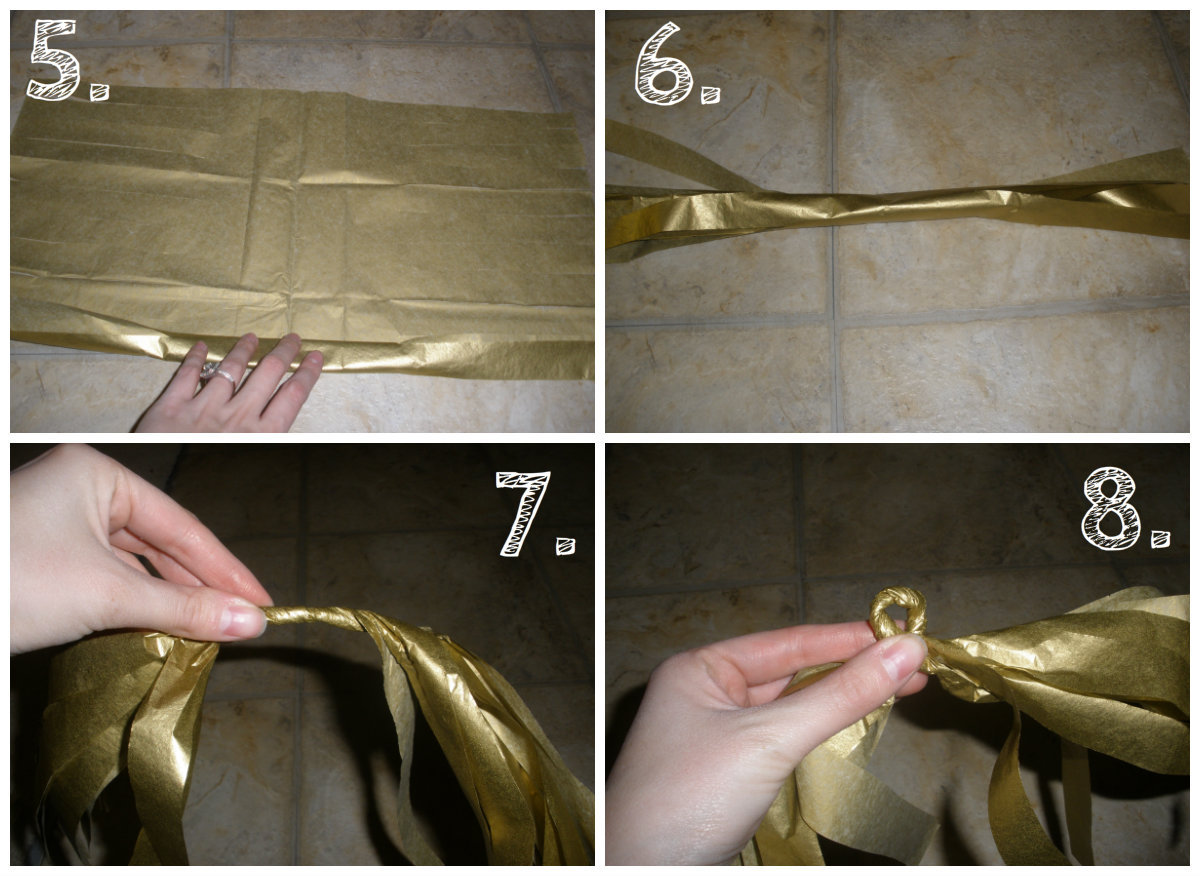
5. Lay the tissue paper flat on the ground. Start rolling the tissue paper up as tightly as you can.
6. As you roll it up, make sure the frayed edges stay to the side so they don’t get tangled. This is what your tissue paper should look like once it is rolled up.
7. Twist the middle of your tissue paper (the portion of the paper that isn’t frayed) as tightly as you can.
8. Once you can’t twist it any tighter, holding the middle with your thumb and index finger, make a loop and continue to twist the center around itself. The finished product should look like this:

9. Make sure the fringed ends are evenly distributed.
10. Using a thick twine, bead 10-15 pom poms onto the twine in pattern of choice and you have your perfect DIY Tissue Paper Pom Pom Garland. For my garland, I used 10 pom poms and lighter colors. My favorite colored tissue paper was the gold. Have fun and decorate!
